Confirm

Broadcast Studio LED Walls: How to Eliminate Flicker, Moiré, and Camera Issues

10.04.2026

Broadcast studios often assume that on-camera LED problems start with the camera. In practice, many of the issues crews describe as “camera artifacts” are rooted in LED wall behavior, processor timing, scan characteristics, pixel structure, or poor commissioning. That is why two studios can use similar cameras and get very different results from seemingly comparable walls.

The most expensive mistake is treating broadcast LED walls like standard signage. A wall that looks excellent to the human eye can still produce rolling bars, moiré, color instability, or strange texture on camera. Studio environments are unforgiving because the camera sees timing, sampling, and pixel interactions differently than the eye does. By the end of this article, readers will have a practical framework for diagnosing flicker, moiré, and sync problems before they affect production, not after the wall is already live.
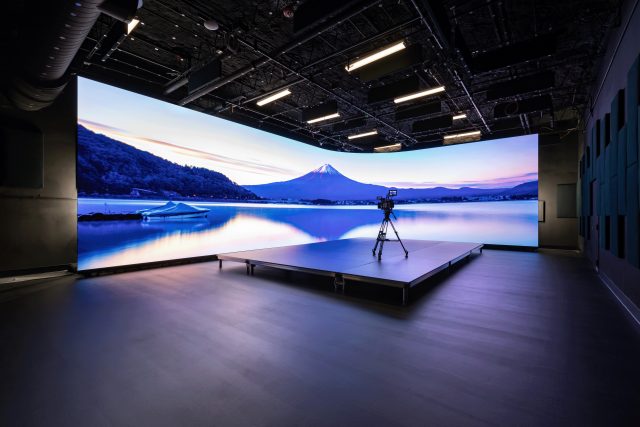
Infiled

Photo Credit © DOOR G

Why LED Walls Behave Differently on Camera

A broadcast camera does not view an LED wall the way a person standing in the studio does. Human vision integrates motion and brightness over time, while cameras sample the scene frame by frame and, in many cases, line by line. That difference is the starting point for most on-camera LED issues.

An LED wall is not a continuous surface in the same way a projection screen or printed backdrop is. It is a matrix of discrete emitters driven by electronics that refresh, scan, and modulate brightness at high speed. A camera can interact with that structure in ways that reveal artifacts invisible to the eye. If the wall refresh timing is out of sync with the camera, rolling bars or flicker may appear. If the wall pixel grid interacts with the camera sensor grid or lens sharpness, moiré can appear. If low-brightness grayscale handling is weak, gradients and darker tones may break apart on screen. Brompton’s explanation of on-camera artifacts is useful here because it frames the problem correctly: the key issue is ensuring the camera sees one stable frame of content rather than partial refresh behavior or phase mismatch.

This is why broadcast buyers should not evaluate an LED wall only by brightness, cabinet design, or a headline refresh-rate claim. The camera-facing behavior of the full system matters more. That includes processor control, PWM behavior, scan method, calibration stability, viewing geometry, and how the wall performs under actual studio exposure settings. INFiLED’s engineering-led approach is relevant in this kind of environment because broadcast success usually depends on system tuning, not just panel procurement.

Flicker: Causes and Solutions

Flicker on camera is usually a timing problem, but the term gets used too loosely. In real broadcast environments, operators may describe rolling bars, scan lines, brightness pulsing, or unstable exposure as “flicker,” even though the root cause can be different in each case.

One common cause is mismatch between the LED wall’s refresh behavior and the camera’s shutter timing. NovaStar’s configuration guidance notes that increasing refresh rate improves image stability and reduces flicker, which is why high-refresh processing is a baseline requirement for camera-facing walls rather than a premium extra. But refresh rate alone is not the full answer. A wall may advertise a high refresh figure and still perform poorly if its timing is not synchronized to the camera environment or if scan behavior introduces partial-frame artifacts.

Another cause is phase mismatch. Brompton points out that when rolling bars are visible, the LED refresh and the camera are not synchronized. If static bars remain even after synchronization, the system may be synchronized but out of phase, which is why genlock and phase adjustment are central tools in professional setups. This distinction matters because crews sometimes keep changing shutter settings when the real fix is upstream in the LED processing chain.

A third cause comes from PWM interaction. Brompton’s technical explanation notes that thin dark or light lines can appear when the camera shutter open time is not an integer multiple of the LED wall’s PWM cycle. That is a deeper timing issue than simple refresh mismatch and is one reason “7680 Hz refresh” marketing does not automatically guarantee artifact-free broadcast performance. What matters is how the wall, processor, PWM behavior, and shutter settings work together in the actual camera chain. Brompton’s artifact explainer is a useful reference because it distinguishes rolling bars, phase issues, and PWM-related line artifacts instead of lumping them together.

The practical solution is to treat flicker as a commissioning problem. The wall should be tested with the actual studio cameras, frame rates, shutter settings, and exposure ranges intended for production. That should happen before sign-off, not during rehearsal week.

Moiré Patterns Explained

Moiré is not a defect in one component. It is the result of two sampling patterns interfering with each other. In a studio LED environment, that usually means the pixel grid of the wall interacting with the sensor grid of the camera, influenced further by lens choice, focus, aperture, shooting distance, and angle.

This is why moiré can appear in one shot and disappear in another without any hardware change. Slight changes in focal length, camera distance, or focus can shift the interaction enough to make the pattern more or less visible. Brompton’s moiré guidance makes this clear, and ROE Visual’s virtual production discussion reinforces that there is no universal “off switch” because the effect is a physics problem tied to overlaid patterns. Their practical advice is also valuable: higher effective display resolution helps, but shot planning and depth-of-field management remain important even when the wall is high quality.

That has direct implications for broadcast studio design. Buyers often assume finer pixel pitch automatically removes moiré. It reduces risk, but it does not eliminate it in every camera position. A finer pitch can improve the relationship between wall structure and camera resolution, yet moiré can still appear depending on lens sharpness and shooting geometry. This is why on-camera evaluation should be done with the actual likely framing ranges, not just a single test shot from centerline. This technical moiré overview is helpful because it explains why processor control, genlock, and phase tools matter alongside pitch selection.

There are also material and finish considerations. ROE notes anti-moiré surface options on certain camera-facing products, which reflects an important point: on-camera performance can be influenced by optical surface behavior, not just electronics. For studio decision-makers, that means wall selection should consider how the front surface behaves under actual lensing and lighting, especially in high-sharpness broadcast and mixed reality applications.

Refresh Rate, Scan Rate, and Camera Sync

Refresh rate and scan rate are often confused, and that creates bad buying decisions. Refresh rate refers to how often the displayed image is updated over time. NovaStar’s documentation defines it directly as the rate of image updating on the display, with higher values helping reduce flicker and stabilize the image. That definition is important, but it is only part of the story.

Scan rate describes how the panel drives rows or groups of LEDs within the module. In simple terms, it affects how much of the panel is being actively driven at a given moment. A panel with a more aggressive multiplexing scheme may be more cost-efficient, but that does not always make it ideal for high-end camera work. Broadcast buyers sometimes focus on advertised refresh rate while overlooking scan behavior, driver quality, grayscale performance, and processor capabilities. That is where spec sheets become misleading.

Camera sync adds another layer. The objective is not just a high-refresh wall, but a wall whose timing can be aligned to the camera ecosystem. Brompton explains that genlock allows the LED processor refresh to align with camera shutter timing, while phase adjustment fine-tunes the relationship to avoid visible artifacts. In more demanding environments, shutter-aware timing tools become critical because they let the wall adapt to the camera setup instead of forcing the creative team into limited shutter choices.

For broadcast studios, this means procurement teams should ask harder questions. Can the processor be genlocked reliably? How does the wall behave at target frame rates such as 25, 29.97, 50, or 59.94? How stable is the image at lower brightness levels where studios often operate? How much control exists over phase and timing? INFiLED and other serious LED manufacturers know these questions matter because broadcast walls live or fail on integration detail, not brochure language alone.

Pixel Pitch and Shooting Distance

Pixel pitch decisions in broadcast are often framed too simply. The assumption is usually that the smallest pitch the budget allows is the safest choice. In reality, the right pitch depends on camera distance, lensing, framing, and how frequently the wall will appear sharp and dominant in shot.

AVIXA’s guidance on display pixel pitch and viewing distance is useful because it explains that acceptable distance is tied to visual acuity and comfort calculations, not marketing convention. In camera-facing studio work, that idea needs to be extended beyond human viewing into capture conditions. A pitch that works for viewers in the room may still be too coarse for a tight studio shot, while a very fine pitch may add cost without material on-camera benefit if the wall is usually backgrounded or shot from longer distances.

Distance also affects moiré risk. ROE’s discussion of virtual production notes that increasing LED resolution relative to camera resolution helps, but shot selection and keeping the wall out of critical depth of field are still important strategies. That logic applies to broadcast studios as well. If presenters are separated properly from the wall and the lensing avoids over-resolving the pixel structure, many camera issues become easier to control.

This is where broadcast studios benefit from practical mock-up testing. A panel that looks similar in a showroom may behave differently once cameras move in for medium and close shots under studio lighting. INFiLED’s experience across demanding visual environments reflects a broader truth: pixel pitch should be selected against real production geometry, not generic “broadcast recommended” language.

Best Practices Before Going Live

The best way to avoid on-camera LED problems is to move testing earlier in the workflow. Broadcast studios should not treat calibration and camera validation as final polish. They are part of specification, commissioning, and acceptance.

A practical pre-live process should include:
• testing with the actual broadcast cameras, not substitute bodies
• checking all production frame rates and shutter settings likely to be used
• verifying genlock behavior and phase alignment
• reviewing the wall at multiple brightness levels, especially lower levels
• testing common lenses, focal lengths, and camera distances
• loading clean test patterns for moiré, grayscale, and color evaluation
• confirming calibration uniformity across cabinets and replacement modules

Megapixel’s OptiTune guidance is useful here because it shows how structured camera setup, test patterns, controlled exposure, and close inspection are part of a repeatable workflow rather than guesswork. It even highlights practical steps such as manual focus checks for moiré and maintaining reasonable test brightness during evaluation. A documented calibration workflow is often what separates a wall that is technically installed from one that is truly production ready.

Studios should also plan for lifecycle consistency. Calibration drift, cabinet replacement, processor changes, and evolving camera packages can all reintroduce issues over time. A stable broadcast wall is not only about day-one performance. It depends on having a repeatable maintenance and retesting discipline. That is where engineering-focused partners tend to outperform purely transactional supply models.

Broadcast LED walls do not become camera-safe by accident. Flicker, moiré, and sync issues usually come from specification gaps, timing mismatch, or incomplete commissioning, not from mysterious camera behavior. The strongest results come when teams evaluate refresh behavior, scan characteristics, pixel pitch, camera distance, and calibration as one connected system. For studios and integrators, that system-level mindset is what turns an LED wall from a visual risk into a dependable broadcast tool.

User registration
Join us to download our content. It only takes a moment!

    I have read and accept the privacy policy

    This site is protected by reCAPTCHA and Google.

    It looks like you are visiting the website from
    Select your region: